Monday, March 26, 2012

An Easter dress for Elise

My sweet little girl is quite a character. While some little girls are "girly-girls" she is the epitome of tomboy. I love it! She isn't afraid of dirt, she doesn't mind hand-me-downs and she won't be easily swayed by the latest fashion must-haves. However, we do run into some minor problems on the rare occasion that I really want her to dress up. Take Easter, for instance. It's a good dressing-up sort of occasion. But, Elise thought a pair of school uniform pants would suffice. I decided to put my mommy foot down, and say that, this Easter, she would wear a dress.

Have you heard of Pinterest? It's my new addiction. Well, I typed in a search for "dresses for little girls" on Pinterest and up came hundreds of dresses. Beautiful, elegant, totally-appropriate-for-Easter, kinds of dresses. She liked one. Just ONE! Out of about 300 in total that we looked at, she chose 1. I could have tried to find it in a store, but I just happened to have a metre of the same fabric (green gingham) in my stash, so I thought I would make it instead. The dress I made doesn't look exactly like the one she chose, but it was the same colour, and had no sleeves, so she said she liked it. And she said she would wear it for Easter.

It's not fancy, and as you can see, she has no trouble climbing on fences in it!


Easter isn't here yet, and I've already gotten her to wear it once! Maybe I put both feet down :)

These are a few pictures that I took of Elise in her new Easter dress after church yesterday saying hello to Papa's chickens... you see, this is also the sort of dress that you can run around the grass in, and visit chickens while wearing!


Here's a view of the back - I had a zipper all ready to go, and then I decided that I would rather put 3 cute little ties on the back to hold it closed than fight with a zipper. I've done zippers and they aren't a big problem, but I thought this was cuter.


We were in Victoria picking up our kids who had spent the week with Grammie and Papa for Spring Break. Elise said that if she had to have all these pictures taken, then the boys should be in at least one of them! They happily obliged me, and were so glad they weren't the main focus of my camera that day :)

Saturday, March 03, 2012

Another birthday gift

Todd's birthday party was yesterday... that post is coming soon, but I still have to get a few pics off of our phones before the photo story can be completed!

Today, Todd is at a party for one of the girls from his class. For this party, the invitation stated that it is a "$5 party" so he was to creatively wrap $5 and that was all he was allowed to give. We came up with an idea this morning to creatively turn $5 into artwork. I wonder if she will keep the coins like this, or if she will peel them all off to spend. Since the picture didn't look complete with just the $5, there is actually about $7 here, but I didn't care! Scott helped Todd make this art, and I think they did a great job!! They are attached with Stampin' Up! glue dots, which will just peel off when she wants to spend some of this money, and it is on a painting canvas, so she can technically use that again, as well.


I also thought she should have something more, and since her favourite colour is blue, I asked Todd if he wanted me to make up a tote to use as the gift bag, and then she can use that for a piano book bag, or whatever she wants to carry in it. I made it in less than an hour, just in time for the party!!

Thursday, March 01, 2012

Teacher Birthday Present

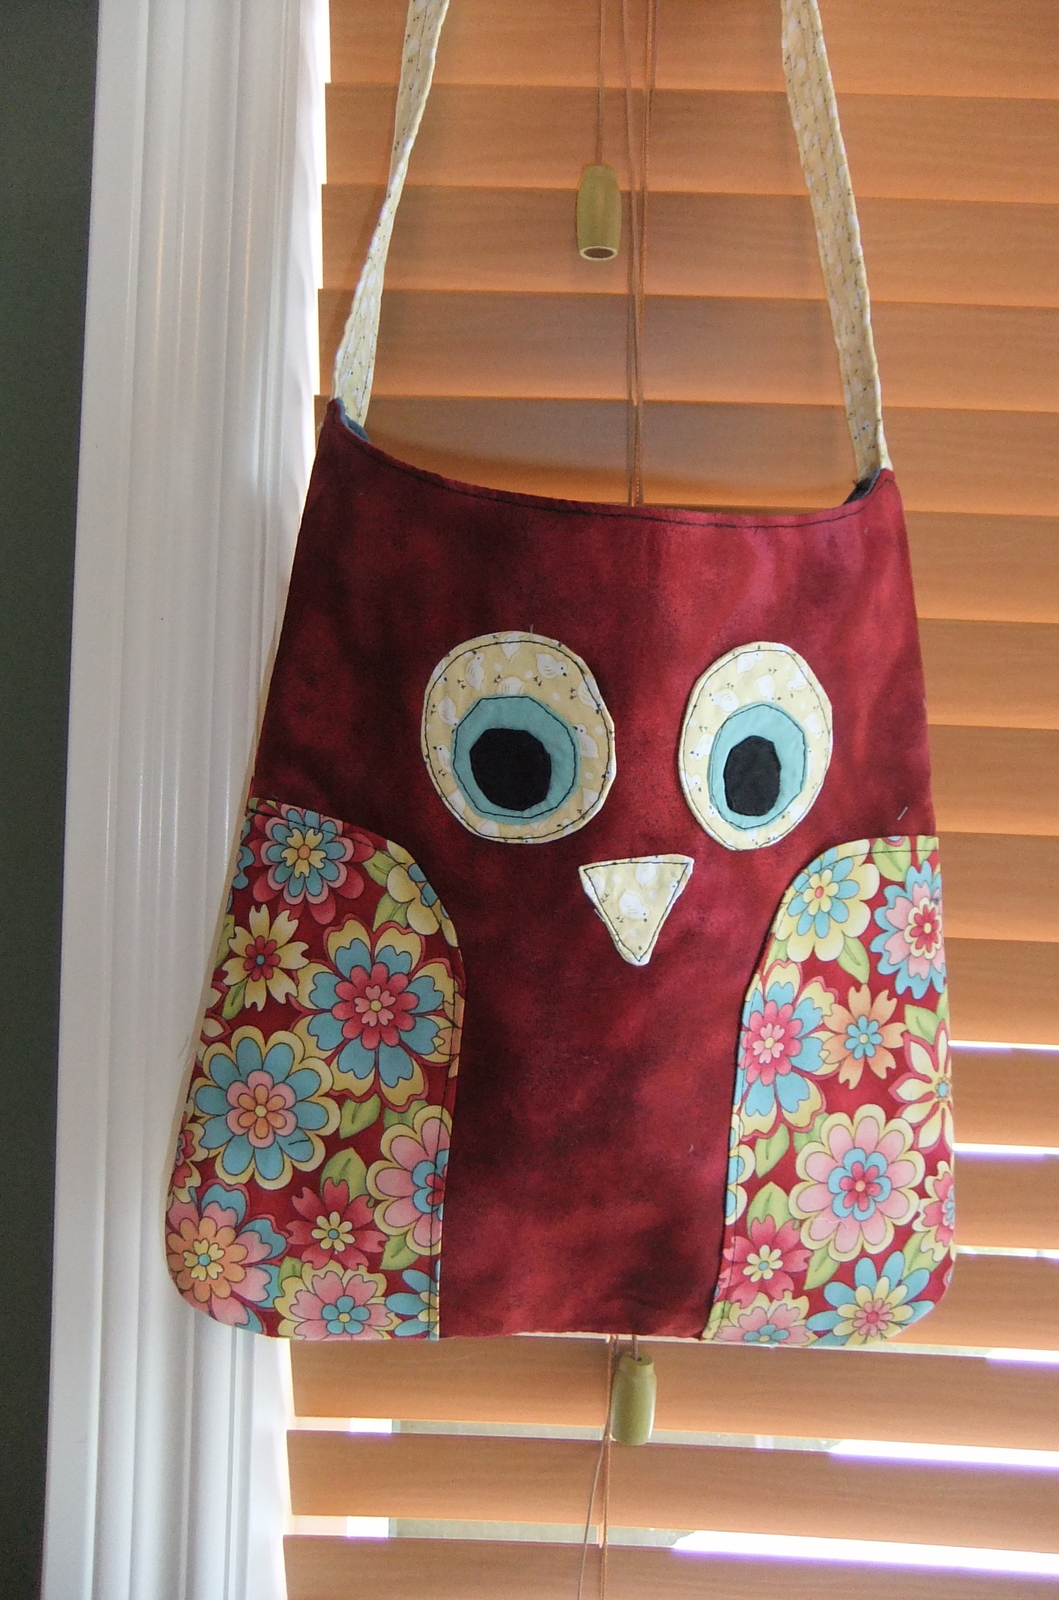
Todd's teacher is celebrating her birthday this weekend, and she has often commented on the bags I make. So, I thought I would make her a teacher-y bag for her special day. I have seen lots of owl patterns around, but I'm not really one to follow a pattern (or a recipe, as my husband likes to point out!) so I drew a quick sketch up last night and then got 'er done! Just put the finishing top stitches on and took a couple pictures. Hope she likes it! I think it will make a cute bag to bring her books to and from school, or carry her marking in. The floral fabric is some of my favourite fabric that I bought a couple years ago to make a different purse called a Phoebe bag. I posted about that project HERE.

Front:


Back... I added a full-width pocket on the back:


Inside... 2 smaller pockets inside:


Tuesday, February 21, 2012

Watercolouring with Kids!

Here are some of the creative works of art the kids have been painting in my Art Kids! classes. These were still life studies and we used watercolour pencils and water brushes.


Art Kids!

My Art Kids! classes have been going great and there is only one left. We have explored different styles of drawing, from realism, pointillism, contour lines and hatching/cross-hatching. We've also talked about why people do art, as well as why everyone's pictures might look a bit different.

The other art mediums we've used so far are acrylics and watercolours. The kids have been great, and their artwork is so much fun to see. The creativity of children is wonderful!

Here are my kids modeling the aprons I made for the kids' classes... hoping that these will protect the kids' clothing while they are here!


Tuesday, February 14, 2012

New Adventure...

It's Valentine's Day, so I am going to write about the man I love. ♥

Well, it's been quiet around our house for the last few weeks. My husband, Steve, has gone to work for awhile in Alberta. He got a job for a trucking company out there, and has been having all kinds of adventures. He has the excitement of a little boy who is getting to play with mighty machines! We are all super excited for him because the desk-life job was just not agreeing with him anymore... he loved his years on the farm, but now, being in town and having a home office, he would look out the window and long to be outside. Now, he gets to do that again!

In January, Steve went through a driving course to get his Class 1, and he got his license on January 24th. On January 25th he got a job... he didn't even have to apply for it, they called him! After completing a series of courses to get 8 safety tickets (I have no idea what they all are, but they include First Aid, TDG, and H2S, plus a bunch more!) so that he could drive on and around oilfields, he set out with another driver for a trip north... way north... like 13 (+) hours north of the Alberta border into the Northwest Territories. That is a land of glorious sunsets, ice roads and small trees.

Along the way, while he wasn't driving, Steve has been sending me pictures. I thought I would share a few on here.


The frozen MacKenzie River... think "Ice Road Truckers" :)


The road goes right over the frozen river! They had to cross the river like this in 2 spots each way.


Steve said it was a bit of a strange feeling to see these ferries parked like this.


He has sent me some amazing sunset pictures. I hope one day I get to take this trip with him!


This week, they are doing some local (around Edmonton) runs and hoping for another northern assignment soon.

Wednesday, February 01, 2012

Free Trial of Digital software...

Want to try your hand at digital designing? Download a 30 day FREE trial of My Digital Studio and start designing TODAY!!

FREE TRIAL

Monday, January 30, 2012

Art Kids

Just one more week until Art Kids classes start! There are still a couple spots available. Contact me soon to register your child.


An exciting new addition to my class line up.....

ART KIDS!!

Art Kids - Art classes for kids aged 6-12. Improve your drawing and painting skills using several different art mediums, including stamping. Classes will be held on Mondays in February from 3:30 - 4:30. $17 per class, or $55 if you sign up for all 4 classes. All supplies provided.

Class dates: February 6, 13, 20, 27

Tuesday, January 24, 2012

Sale-A-Bration

Sale-a-Bration 2012 is HERE!!

Click to see the brochure: SAB 2012

Shop 24/7 at my website and start earning free rewards with purchase now!

My Stampin' Website!

Saturday, January 07, 2012

Brunch

I don't share many recipes on this blog since that's not my first love, or a huge interest of mine. Now, if my husband kept HIS blog up to date, then I am sure there would be a million recipes on his blog because he is amazing! But, I just came across this super simple, and super yummy-looking brunch idea, so I thought I would share the link with you.

Super Simple Brunch Strata

Hmmm... we're having company over for brunch next weekend - maybe I will try this recipe on them :)

Thursday, January 05, 2012

Occasions Mini Catalogue is HERE!!!

The new mini catalogue is LIVE! Great new products in coordinating "suites": Twitterpated, Attic Boutique, Sweet Shop.

You'll love the new papers, embellishments and of course, stamp sets.

OCCASIONS MINI


Online shopping - SHOP 24/7 on my website: SHOP NOW

Tuesday, January 03, 2012

In my stocking this year....

Well, once again, I was spoiled this year! Family, Friends, Feasts, Festivities... amazing memories created, and many photos taken.

I thought I would share one of the treasures that I received this year. I am quite excited about this. A friend from Victoria has started making delicious soaps. One found its way to my stocking (thanks mom :) - this is the peppermint bar from Carriage 44. Check them out on facebook, or click on the link for their website.

Scandinavian Hearts

We hosted Christmas for Steve's family this year, and I made these Scandinavian Hearts to hold chocolates as the kids' place settings. They are a tradition in Scandinavian countries, and are super easy to make. I remember making them with my Mormor and my mom when I was young. I've often done them with kids at school, and once you've made one, they are easy as pie! When we would go to my Mormor and Morfar's house on Christmas Eve, they would have these hearts on their tree, and sometimes there would be small gifts in them, or an orange or some candies. They can be made any size and I think some really small ones would be cute on the front of a card, or you could make some up the right size to be a gift card holder. They are pretty at Christmas time, but also very appropriate for Valentine's Day ♥

I didn't use a template - just cut the 2 pieces on folds and then cut straight lines, but if you want to see some directions, here's a good tutorial: WOVEN HEARTS

I used some colourful Christmas paper, but other things like newspaper, wrapping paper, and even old wallpaper books are great papers for these hearts.

Thursday, December 22, 2011

10 years.... TEN YEARS!!!

It's our anniversary. Our tenth. I'm pretty proud of that. I knew the minute I laid eyes on Steve that he was going to be mine. Of course, it just took him a little bit longer (like 18 months!) to figure that out, but he did. Bless his heart, he did, and then 3 1/2 months later he asked me to marry him. I said yes. And 3 1/2 months after that, we got married. 3 days before Christmas.

When I was in the store the day before our wedding and I happened to mention to the clerk that I was getting married the next day, she took my hand and said, "Oh congratulations... I hope you get SNOW!"

What an awful thing to say to someone about to get married! Granted, it was 3 days before Christmas, but the last thing I wanted, in my sleeveless wedding dress, was snow. Good night lady, what are you thinking?!

It didn't snow. It was plus 10 on our wedding day and we even had some outdoor photos. I had a sleeveless gown and not a care that it was the 2nd day of Winter.

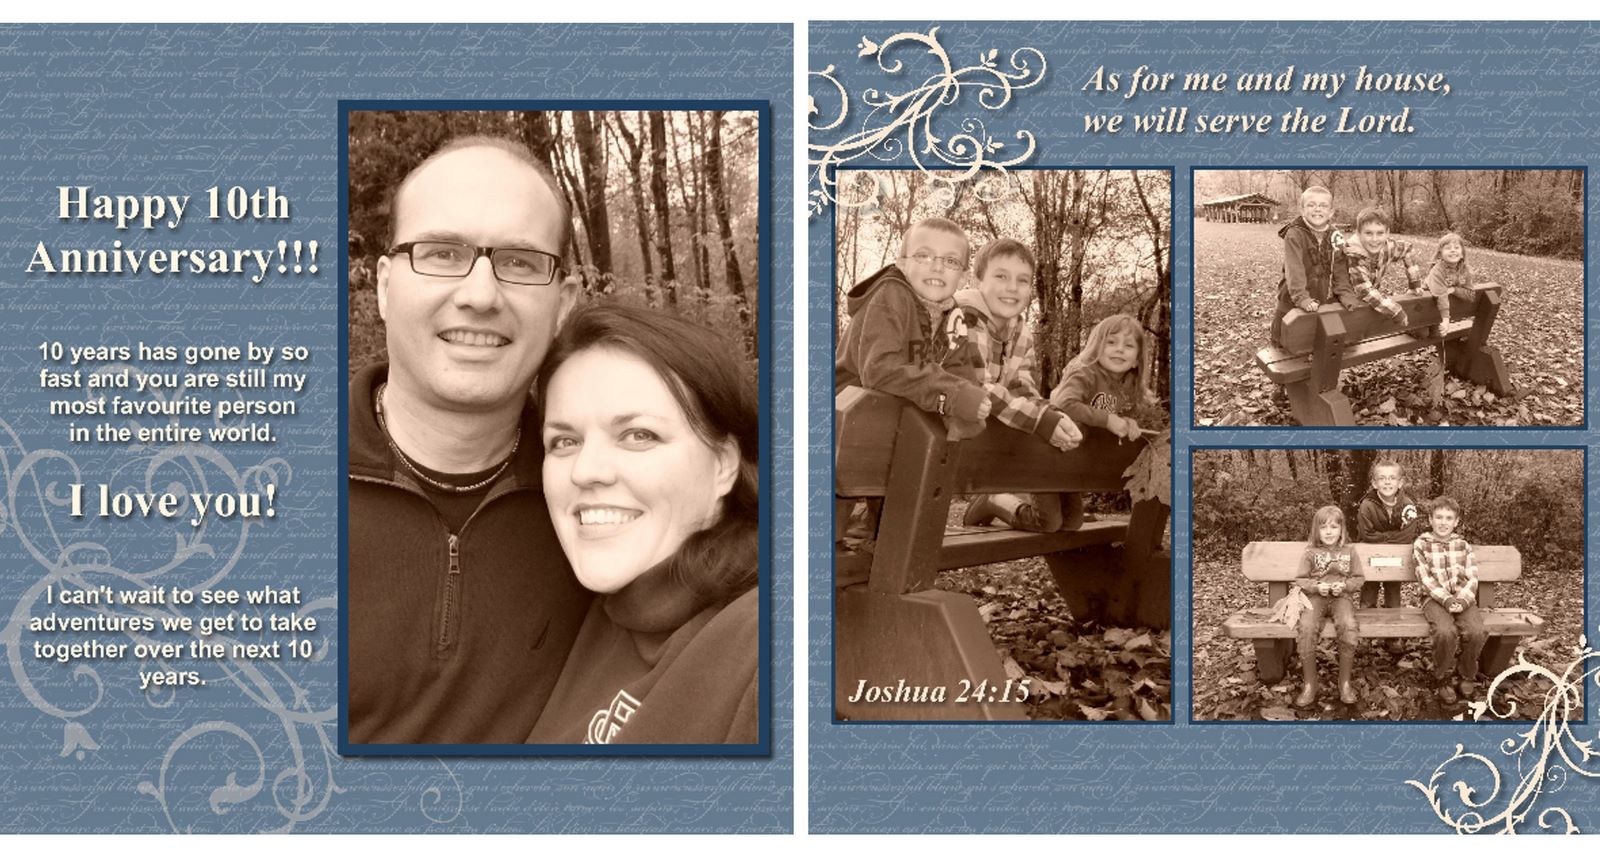
We spent our first Christmas together in Cuba. Such a great vacation for our honeymoon. Over the years, I've been adding pages here and there, to a scrapbook for Steve. I haven't done anything for awhile, so I thought I would do up a couple pages in MDS (My Digital Studio) and give them to him on our anniversary.

Happy Anniversary, Steve.
I love you with all my heart!

Here's the double layout...

Pages separated to show the detail better. MDS is such a great tool to use, and I find myself using it for far more than just digital scrapbooking.


Friday, December 16, 2011

Clearance Rack

Don't wait for Boxing Day - there's deals to be had now!

Tons of new items added to the Clearance Rack. Check out my website for savings up to 80%...


Online orders only... click here for my website: ONLINE STORE

Thursday, December 08, 2011

C is for Cookie!!!

Here's something new from Stampin' Up! I love the new cookie stamps from Stampin' Up!

Click on this link for more details and to see it in my online store: Sweet Pressed Cookie Stamps

I bought them last month, but didn't get a chance to try them until now. I finally put them to good use (in time for last Monday's class!!) I cheated a bit on the cookie dough, and bought it through the grade 5 fundraiser at my kids' school. But there are 2 fabulous recipes included in the cookie stamps, so next time I use them (when I have a bit more time....) I will try out those recipes and then report back on them! I also want to try these stamps with my mom's awesome shortbread cookie recipe. That was a favourite growing up.


You can see the Sweet Pressed Cookie stamps in action on the SU! channel on You Tube: VIDEO


Wednesday, November 30, 2011

Online Extravaganza!!!

ENDS TODAY... Last Chance for some amazing Christmas Deals!


Check out what Stampin' Up! has in store for you this holiday season....

Starting TODAY! Head to my online store and check out the great deals.

SHOP NOW!! 24/7 CLICK RIGHT HERE!

** please note: to get these deals you must place orders online. Click on the link above to get to my website store. Orders of $200 or more qualify for great hostess benefits!
Happy Shopping!!


Tuesday, November 08, 2011

Chowder 'n Biscuits

Last night Steve said, "I feel like chowder 'n biscuits - I'll make the chowder if you make the biscuits!" What a deal! I can make biscuits, no problem.

Then, I couldn't find my recipe. Should have it in my head, but it's not there. Happened to be on the phone with my sister at the time, so she pulled out her recipe and I quickly jotted it down. It's a good one, too! I'll be making these again.

Biscuit recipe is below... seafood chowder recipe is a secret :) (only because I don't know what Steve did... but I assure you that it was DELICIOUS!)


Cheesy Dill Biscuits

1 Cup shredded cheddar
1 1/3 Cups flour
1 TBS baking powder
1/2 tsp salt
1 TBS white sugar
1/2 - 1 tsp dill weed (I used an epicure dill mix that I had on hand)
1 egg slightly beaten
2 TBS oil
3/4 Cup milk

Do the dry ingredients together, wet together, then both together... bake at 375 for 15 - 20 minutes. Makes 12 in a muffin pan.

My sister recommended that I double the recipe... good plan! The kids LOVED them, and we polished off the lonely few leftovers for breakfast this morning. The only thing I will change is I don't think I'll use muffin papers again... just lightly grease the pan instead. It was hard to get them out of the papers. I don't know if that's because of something I did, or what, but I'd rather wash muffin pans than struggle with muffin papers. The ones this morning came out of the papers fine, so maybe they just needed to completely cool - but really, who wants to let fresh biscuits COOL before eating them? Yep, that settles it... I will not use papers next time.

Sunday, November 06, 2011

A New Blankie!

I wasn't the kind of kid to have a "blankie" but I have one now!! I have been working on this rag quilt for quite awhile. I started it, and then lost interest, then worked on it a bit here and there over the past year. It's not very big, but it's still the biggest quilt I've ever made. It is about 55" square. I planned this to be my movie-watching blanket, and I am heading down to watch a movie right now... can't wait to try it out!


This is how the quilt started. A bunch of paper pieces glued together to make a pattern. I am very scientific when it comes to planning things (totally kidding... I am often called a "winger!" So the fact that I had a pattern, and that it came out relatively close to the original design is really amazing!)


Next, I gathered my fabric and used the scallop square die for my Big Shot and started cutting out fabric pieces. That part is super fun - best way to cut out fabric ever!


It's pretty cozy!


The back... one of the quilters that I follow on Google Reader always pieces her back, and I love that that gave me "permission" to use bits and pieces on the back of my quilt. Next time I'll get a little more creative, but it was hard enough keeping the design on track for the front of the quilt, let alone the back, so it is as it is on the back!


Close up of the rag squares. I have made several bags with this rag technique, but this is the first blanket. Love it... will do it again for sure!

Tuesday, November 01, 2011

November Hostess Benefits!

It always pays to be the hostess with Stampin' Up! and in the month of November, all the way until December 15th, hostesses are getting an even bigger reward. An extra $45 in free merchandise when you host a workshop of $450 or more.

Call or email me today for more information, or start asking around to your friends and relatives to gather $450 worth of orders for a catalogue party!

click on link for more info:
IT'S GOOD TO BE THE HOSTESS